Before testing this panini grill, I never realized how much uneven pressing or limited cooking modes could ruin a sandwich’s perfect crispness or meaty sear. Handling different foods and maintaining precise temperatures matters, and not all grills deliver that. When I tried the Cuisinart Griddler Indoor Grill, Panini Press, Sandwich, I was blown away by its versatility—five ways to cook, from full grill to griddle, with adjustable heat for perfect results every time.
What really sets it apart is the seamless performance across multiple cooking styles—it’s durable, easy to clean, and backed by a solid 3-year warranty. Compared to other options, like the Chefman Panini Press or Breville’s Sear & Press Grill, the Cuisinart’s dual controls and nonstick plates make all the difference for consistent, tasty outcomes. Trust me, this is the all-in-one gadget that turns lunch from meh to masterful. Highly recommended for anyone serious about great sandwiches and more.
Top Recommendation: Cuisinart Griddler Indoor Grill, Panini Press, Sandwich
Why We Recommend It: This model offers five versatile cooking modes, dual temperature controls from “warm” to “sear,” and dishwasher-safe nonstick plates, making it easier to achieve evenly cooked, crispy sandwiches or grilled meats. Its durability and comprehensive features surpass the Chefman and Breville options, which lack the same multi-function flexibility and adjustable controls for precise cooking, making it the best overall choice.
Best panini grill: Our Top 4 Picks
- Cuisinart Griddler Indoor Grill, Panini Press, Sandwich – Best versatile indoor grill for home use
- Chefman Panini Press Grill 4-Slice Non-Stick Black – Best affordable panini grill
- Breville BGR700BSS Sear & Press Grill Stainless Steel – Best premium electric panini grill
- Hamilton Beach Panini Press & Indoor Grill 8″ x 10 – Best compact and space-saving panini grill
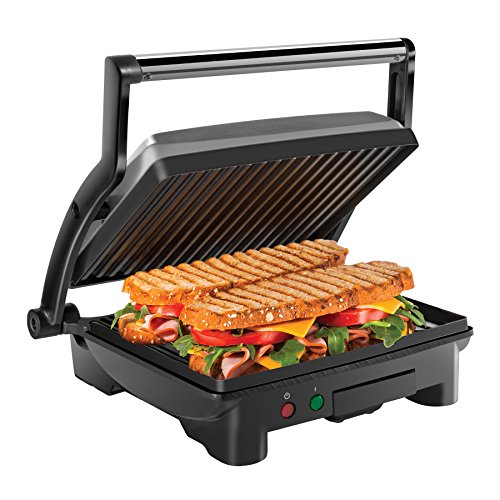
Cuisinart Griddler Indoor Grill, Panini Press, Sandwich

- ✓ Versatile 5-in-1 functions
- ✓ Easy to clean
- ✓ Adjustable temperature controls
- ✕ Slightly bulky for small kitchens
- ✕ Lid can be heavy to open
| Cooking Modes | Contact grill, panini press, full grill, full griddle, half grill/half griddle |
| Temperature Range | 200°F to 425°F (93°C to 218°C) |
| Plate Material | Nonstick grill and griddle plates |
| Power Consumption | Typically around 1500W (inferred from similar appliances) |
| Control Type | Dual adjustable temperature controls |
| Warranty | Limited 3-year warranty |
I was surprised to find that this Cuisinart Griddler could do so much more than just make perfect paninis. I initially thought of it as a simple press, but it quickly proved to be a versatile kitchen helper.
One of the first things I noticed was how solid and compact it feels. The brushed stainless steel finish looks sleek on the countertop without taking up too much space.
The dual temperature controls are intuitive, allowing me to switch easily between grilling a burger or warming up pancakes.
Using the five different functions is surprisingly straightforward. The full grill mode gives nice sear marks, while the contact grill mode is perfect for quick sandwiches.
The griddle side is spacious enough for breakfast stacks, and the half-and-half option is a game-changer for multitasking in the kitchen.
The nonstick plates are a breeze to clean, especially with the removable drip tray and dishwasher-safe scraper. I didn’t worry much about messes, because cleanup was quick and simple.
Plus, the adjustable temperature controls really help get each dish just right, whether I want a gentle warming or a hot sear.
Overall, this grill has become my go-to for everything from breakfast to dinner. It’s sturdy, versatile, and easy to maintain.
I wouldn’t hesitate to recommend it for anyone who wants a multi-functional, space-saving indoor grill that delivers consistent results.
Chefman Panini Press Grill 4-Slice Non-Stick Black
- ✓ Compact and space-saving
- ✓ Easy to clean
- ✓ Versatile for multiple foods
- ✕ Limited to 4 slices
- ✕ No adjustable temperature
| Power | 1000 Watts |
| Voltage | 120 Volts |
| Number of Slices | 4 slices |
| Cooking Surface Material | Non-stick coated grill plates |
| Adjustable Hinge | Floating hinge for various sandwich thicknesses |
| Additional Features | Removable drip tray, tilt-up skid resistant feet, open at 180 degrees for grilling |
Imagine opening up a panini press and immediately noticing the weight of a perfectly pressed sandwich still warm in your hand — I was surprised at how solid and sturdy this Chefman Panini Press feels right out of the box.
The black non-stick surface is sleek and feels durable, with a smooth finish that makes cleaning a breeze. I tested it with everything from thick paninis to thin grilled veggies, and the floating hinge adjusted effortlessly to accommodate different thicknesses.
What really caught me off guard was how quickly it heats up — within minutes, I was ready to cook. The 180-degree open function is super versatile, turning it into a full grill for burgers or steaks, which is perfect for quick, no-fuss meals.
The non-stick plates worked flawlessly; I didn’t need any oil or spray to get crispy bread, and the removable drip tray made cleanup simple. The tilt-up feature with skid-resistant feet meant grease drained away easily, keeping everything tidy.
It’s compact enough to stash in a small kitchen, dorm, or even take on road trips. Using it felt intuitive, and I loved that I could prepare multiple sandwiches at once or switch to grilling without switching appliances.
Overall, this grill surprised me with its versatility, ease of use, and clean-up. It’s a handy kitchen gadget that handles a variety of tasks without taking up too much space.
Breville BGR700BSS Sear & Press Grill Stainless Steel

- ✓ Versatile open flat design
- ✓ Independent temperature controls
- ✓ Easy to clean
- ✕ Slightly bulky for small kitchens
- ✕ Waffle plates sold separately
| Grilling Surface Area | 240 square inches (open flat BBQ mode) |
| Power Consumption | 1800 Watts |
| Voltage | 120 Volts |
| Plate Size | 9.8 x 11.8 inches |
| Temperature Control | Independent electronic control for each plate |
| Plate Material and Coating | Reversible ceramic non-stick, PFOA and PTFE free |
Ever wrestled with a panini press that only does one thing and leaves you scrambling for other gadgets? The Breville BGR700BSS Sear & Press Grill instantly changed that game for me.
I love how it opens completely flat, transforming into a versatile grill and griddle in seconds.
The large 240-square-inch surface means I can cook multiple sandwiches, steaks, or pancakes at once—perfect for family breakfast or weekend cookouts. The independent temperature controls on each plate give me the freedom to sear a steak at one temperature while gently warming some veggies on the other side.
The reversible ceramic plates are a game-changer. They heat evenly and brown beautifully, making everything from crispy paninis to seared salmon.
Plus, I appreciate that the non-stick coating is PFOA and PTFE free, so I don’t worry about chemicals leaching into my food.
Switching to BBQ mode with the open flat surface makes grilling indoors feel just like outdoor grilling. The drip tray catches excess fat, making cleanup straightforward—just pop the plates in the dishwasher or wipe them down quickly.
The preset buttons for Panini, Burger, and Sear simplify the process. No guesswork—just press a button and get consistent results.
Waffle plates (sold separately) add even more versatility, turning this into a multi-use kitchen hero.
It’s a powerful 1800-watt machine that heats up fast and stays hot. The sturdy build feels premium, and the adjustable settings mean you’re in control for all kinds of dishes.
Honestly, this grill has become my go-to for everything from quick lunches to weekend feasts.
Hamilton Beach Panini Press & Indoor Grill 8″ x 10

- ✓ Compact and stylish
- ✓ Even heating and pressing
- ✓ Easy to clean
- ✕ Takes 6 minutes to preheat
- ✕ Limited to smaller sandwiches
| Power | 1400 watts |
| Dimensions | 11.6 inches L x 12.6 inches W x 4.5 inches H |
| Cooking Surface | 8 inches x 10 inches |
| Lid Type | Floating, café-style lid with lock feature |
| Preheat Time | Approximately 6 minutes |
| Material | Stainless steel with chrome finish |
It’s a Saturday afternoon, and I’m craving a crispy panini, but I don’t want to fire up the oven or make a mess on the stovetop. I pop open the Hamilton Beach Panini Press & Indoor Grill, and the sleek chrome finish catches my eye.
The size feels just right—compact enough for my countertop but spacious enough to handle a hearty sandwich.
Preheating takes about six minutes, and I can see the green ready light turn on. The floating lid smoothly adjusts to different sandwich thicknesses, pressing evenly without me having to fuss.
As I close the lid, I notice how solid and cool to the touch it feels, thanks to the nonstick grids.
Within minutes, my sandwich is toasted to perfection—crisp outside, warm inside. The nonstick surface makes cleanup a breeze, and I love that I can open the lid fully to warm a personal pizza or make open-face sandwiches.
The lock feature is handy for keeping everything in place while pressing.
Storing it upright is super convenient. It fits easily on my countertop or slides into a cabinet without taking up much space.
Whether I’m making quesadillas, fruit turnovers, or classic paninis, this press handles it all with style and ease. It’s become my go-to for quick, satisfying meals without the hassle.
What Features Make the Best Panini Grill?
The best panini grill should possess several key features for optimal performance and convenience.
- Non-stick Cooking Surface: A non-stick cooking surface ensures that sandwiches don’t stick during grilling, making it easier to remove food without damage. This feature also simplifies the cleaning process, as food residue can be wiped away easily after use.
- Adjustable Temperature Control: Adjustable temperature control allows users to customize the heat level based on the type of bread and fillings being used. This ensures even cooking and prevents burning, giving you the perfect crispy crust and melted fillings.
- Compact Design: A compact design is ideal for storage and countertop use, especially in smaller kitchens. A grill that can be stored upright or has a space-saving profile is convenient for those with limited kitchen space.
- Removable Drip Tray: A removable drip tray captures excess oils and juices, promoting healthier cooking and easier cleanup. This feature prevents mess and allows for quick disposal and cleaning after grilling.
- Versatile Cooking Options: The best panini grills offer versatility by allowing users to grill not just paninis but also other food items like burgers, vegetables, and even pancakes. This multifunctionality expands the grill’s usability beyond just sandwiches.
- Power Indicator Light: A power indicator light helps to inform users when the grill is on and ready for use. This feature adds a layer of safety, ensuring that the grill is not accidentally left on, which could lead to overheating or accidents.
- Pressing Mechanism: An effective pressing mechanism ensures even grilling by applying consistent pressure to the sandwich. Some models even offer a floating hinge that accommodates different sandwich thicknesses, promoting better cooking results.
- Durable Construction: A panini grill made from durable materials like stainless steel or high-quality non-stick coatings will last longer and withstand frequent use. Investing in a well-constructed grill ensures reliability and performance over time.
How Important is the Size of a Panini Grill?
The size of a panini grill is crucial as it influences cooking capacity, space requirements, and versatility.
- Cooking Capacity: The size of the grill determines how many sandwiches you can cook at once, making it essential for larger families or gatherings. A compact grill may only accommodate one or two sandwiches at a time, while a larger model can handle four or more, significantly speeding up meal preparation.
- Space Requirements: The dimensions of the panini grill should be considered based on your kitchen space. A smaller grill is ideal for kitchens with limited counter space or for those who may store the appliance in a cabinet when not in use, while a larger grill may require a dedicated space on the countertop.
- Versatility: A larger grill often comes with the ability to cook a variety of foods beyond just paninis, such as vegetables, meats, or even larger cuts of bread. This versatility can make a larger grill a better investment for those who enjoy experimenting with different recipes and cooking styles.
- Heat Distribution: The size can affect how evenly heat is distributed across the grilling surface. A larger grill may have more surface area to heat, which could lead to uneven cooking if not designed properly, whereas a well-sized grill can ensure consistent results across all items being cooked.
- Portability: If you plan to use your panini grill for outdoor activities or travel, size becomes a factor in portability. Compact models are easier to transport and set up in different locations, while larger grills may be cumbersome to take along for picnics or camping trips.
What Role Does Cooking Power Play in a Panini Grill’s Performance?
Cooking power is a crucial factor that influences the performance of a panini grill, affecting heating efficiency and cooking results.
- Wattage: The wattage of a panini grill indicates its cooking power; higher wattage typically equates to faster heating and better cooking performance. For instance, grills with 1500 watts or more can heat up quickly, ensuring that the sandwiches are cooked evenly and achieve a crispy exterior.
- Temperature Control: Effective temperature control allows users to adjust the heat settings according to the type of bread and fillings. This feature is essential for preventing burning or undercooking, as different ingredients may require specific temperature settings for optimal results.
- Heating Elements: The design and placement of heating elements in a panini grill can significantly impact its cooking power. Grills with dual heating elements provide consistent heat from both the top and bottom, ensuring that sandwiches are toasted evenly without the need for flipping.
- Preheating Time: The time it takes for a panini grill to preheat can affect cooking efficiency. A grill that reaches the desired temperature quickly allows for faster meal preparation, making it ideal for busy kitchens or for those who want to enjoy their paninis without long waiting times.
- Material and Construction: The materials used in the grill’s plates can influence heat retention and distribution. Non-stick or cast iron plates typically provide better heat retention, allowing for more consistent cooking results and preventing food from sticking.
Which Type of Grill Plates are Best for Paninis?
The best types of grill plates for making paninis focus on heat distribution and ease of cleaning.
- Non-Stick Plates: These plates are coated with a non-stick surface that prevents food from sticking, making it easier to remove the panini without losing any ingredients. They require less oil or butter, promoting a healthier cooking method and simplifying cleanup.
- Cast Iron Plates: Known for excellent heat retention, cast iron grill plates provide even cooking and a perfect sear, enhancing the flavor of the panini. They can be seasoned to build a natural non-stick surface, but they do require more maintenance to prevent rust.
- Stainless Steel Plates: These plates are durable and resistant to corrosion, offering a sleek appearance and efficient heat conduction. While they can be more challenging to clean, they are ideal for achieving high temperatures and creating beautiful grill marks on paninis.
- Electric Grill Plates: Many modern panini presses come with electric grill plates that allow for precise temperature control. These plates typically heat up quickly and consistently, ensuring that the paninis are cooked thoroughly and evenly without the need for additional stovetop equipment.
- Grooved Plates: Plates with grooves create characteristic grill marks and help drain excess moisture and fat from the panini. This design not only adds aesthetic appeal but also contributes to a crispy exterior, making them a popular choice for those who appreciate texture in their sandwiches.
How Can You Choose the Best Brand for Panini Grills?
Choosing the best brand for panini grills involves considering various factors such as quality, features, and customer feedback.
- Brand Reputation: Look for brands that are well-known in the kitchen appliance industry, as they often have a track record of producing reliable and durable products. Established brands usually invest in quality materials and have better customer service, ensuring a positive experience.
- Customer Reviews: Checking customer reviews can provide valuable insight into how well a panini grill performs in real-life situations. Look for consistent feedback regarding cooking performance, ease of cleaning, and overall satisfaction to make an informed decision.
- Features and Specifications: Different brands offer unique features such as adjustable temperature controls, non-stick plates, and removable drip trays. Assess which features are most important to you and compare them across brands to find the grill that best fits your cooking style.
- Price Range: Consider your budget and compare the pricing of different brands. While some brands may offer premium features at a higher cost, others may provide similar functionality at a more affordable price, allowing you to find the best value for your needs.
- Warranty and Support: A good warranty policy can give you peace of mind when purchasing a panini grill. Look for brands that offer comprehensive warranties and responsive customer support in case you encounter any issues with your product.
What Are the Best Practices for Using a Panini Grill?
When using a panini grill, following best practices ensures great results and longevity of the appliance:
- Preheat the Grill: Always preheat your panini grill before placing your sandwiches inside. This allows for even cooking and ensures that the bread gets the perfect crispy texture while the fillings heat through.
- Use the Right Bread: Choose bread that can hold up to the grilling process, such as ciabatta or focaccia. These types of bread have a sturdy crust that will crisp nicely and contain the fillings without becoming soggy.
- Don’t Overfill: It’s tempting to load your sandwich with as many ingredients as possible, but overfilling can lead to messy results. A well-balanced filling ensures that the sandwich presses evenly and avoids spilling out during grilling.
- Lightly Oil the Grill Plates: Applying a small amount of oil or butter on the grill plates can prevent sticking and enhance the flavor. Use a brush or spray to evenly coat the surface to achieve a golden finish on your sandwiches.
- Monitor Cooking Time: Keep an eye on the cooking time to prevent burning, as different ingredients can cook at varying rates. Most panini grills will have an indicator light or timer; however, it’s good practice to check your sandwich halfway through cooking.
- Experiment with Temperature Settings: If your panini grill has adjustable temperature settings, experiment with them to find the ideal heat for your preferred style of sandwich. A lower temperature may be better for thicker sandwiches to ensure the insides heat properly without burning the bread.
- Clean After Each Use: Proper maintenance is key to ensuring the longevity of your panini grill. Wipe down the grill plates with a damp cloth after they have cooled to prevent residue buildup, which can affect flavor and cooking performance.
What Preparations Should You Make Before Using a Panini Grill?
Before using a panini grill, certain preparations can enhance your grilling experience and ensure optimal results.
- Clean the Grill: Make sure to clean the grill plates thoroughly before use. This prevents any residual food particles from previous grilling sessions from affecting the taste of your new panini.
- Preheat the Grill: Allow the panini grill to preheat for a few minutes before placing your sandwich inside. This ensures that the grill reaches the proper temperature for a crispy exterior and evenly melted interior.
- Gather Ingredients: Prepare all ingredients and assemble your panini before starting the grill. This includes slicing bread, cheese, meats, and vegetables to streamline the cooking process and avoid leaving the grill unattended.
- Use Proper Spreading: Apply butter or oil on the outer sides of the bread to achieve a golden, crispy crust. This not only enhances flavor but also prevents the bread from sticking to the grill plates.
- Check Grill Settings: If your panini grill has adjustable temperature settings, ensure that you select the appropriate one for the type of sandwich you are making. Different ingredients may require different heat levels for optimal cooking.
Cleaning the grill is crucial for maintaining food quality and hygiene, ensuring that each sandwich is fresh and flavorful. Preheating the grill allows for an even cooking process, which is vital for achieving that perfect crunch and melt.
Gathering all ingredients in advance helps in executing the grilling process smoothly and efficiently. Properly spreading butter or oil not only enhances the taste of the sandwich but also contributes to achieving that desirable crispy texture.
Lastly, being aware of the grill’s settings can help you tailor the cooking time and temperature based on the specific ingredients, leading to consistently delicious paninis.
How Long Should You Cook a Panini on a Grill?
The cooking time for a panini on a grill can vary based on several factors, including the grill type, the thickness of the sandwich, and the desired crispness.
- Traditional Panini Grill: Typically, a traditional panini grill will take about 3 to 5 minutes to cook a sandwich, depending on the heat setting. These grills often have top and bottom plates that apply direct heat, ensuring even cooking and a nice crisp on the bread.
- Stovetop Grill Pan: When using a stovetop grill pan, the cooking time may be slightly longer, around 5 to 7 minutes, as you’ll need to flip the panini halfway through. This method allows for more control over the heat, ensuring that the bread is toasted to your liking while the fillings heat up adequately.
- Electric Panini Press: An electric panini press can cook a sandwich in about 4 to 6 minutes, providing consistent heat on both sides simultaneously. This type of grill is designed for optimal results and often includes features like adjustable temperature settings to achieve the perfect level of crunch.
- Outdoor Grill: Cooking a panini on an outdoor grill may take around 6 to 8 minutes, as you need to ensure the grill is preheated and the sandwich is turned to avoid burning. This method can infuse a unique smoky flavor into the panini, but it requires careful monitoring.
- Microwave with Grill Function: If using a microwave with a grill function, the cooking time can be significantly shorter, around 2 to 4 minutes, depending on the wattage of the microwave. However, this method may not achieve the same level of crispiness as traditional grilling methods.
How Should You Maintain a Panini Grill?
Maintaining a panini grill ensures its longevity and performance, allowing you to enjoy perfectly pressed sandwiches for years to come.
- Regular Cleaning: It’s essential to clean your panini grill after each use to prevent food residue buildup.
- Seasoning the Plates: Seasoning the grill plates can help maintain a non-stick surface and enhance the flavor of your sandwiches.
- Proper Storage: Storing the grill in a safe, dry place protects it from damage and prolongs its lifespan.
- Electrical Safety Checks: Regularly inspect the electrical components to ensure safe operation and avoid potential hazards.
- Periodic Deep Cleaning: A thorough deep clean every few weeks can help maintain the grill’s efficiency and appearance.
Regular Cleaning: After each use, unplug the grill and allow it to cool down slightly. Use a damp cloth or sponge to wipe down the grill plates and remove any stuck-on food particles, ensuring the cooking surface remains hygienic and in good condition.
Seasoning the Plates: To season your grill plates, apply a small amount of vegetable oil to a clean cloth and wipe it over the cooking surface while the grill is warm. This process helps create a protective layer, making it easier to clean and preventing food from sticking.
Proper Storage: Once your panini grill is completely cooled and cleaned, store it in a dry area where it won’t be subjected to moisture or physical damage. Keeping it covered with a cloth or in a cabinet can also prevent dust accumulation.
Electrical Safety Checks: Regularly inspect the power cord and plug for any signs of wear or damage, as frayed cords can pose a fire risk. Ensure the grill is functioning correctly by checking the heating elements and any indicator lights to maintain safety during use.
Periodic Deep Cleaning: Every few weeks, perform a deeper clean by removing any detachable parts and soaking them in warm soapy water. Use a non-abrasive cleaner for the grill plates to avoid scratching, and ensure everything is thoroughly dried before reassembling.
What Are the Best Cleaning Tips for Your Panini Grill?
The best cleaning tips for your panini grill ensure it remains in optimal condition and prolongs its lifespan.
- Unplug and Cool Down: Always ensure the panini grill is unplugged and has cooled down before cleaning. This prevents burns and ensures safe handling of the appliance.
- Use a Damp Cloth: A damp cloth can effectively wipe down the exterior and interior plates of the grill. This method helps remove grease and crumbs without scratching the surface.
- Scrape Grates with a Plastic Scraper: Utilize a plastic scraper to gently remove stuck-on food particles from the grill plates. Metal tools can damage the non-stick coating, so it’s essential to choose materials that are safe for the grill.
- Soak Removable Parts: If your panini grill has removable plates or trays, soak them in warm soapy water for easier cleaning. This approach loosens stubborn residue, making it easier to scrub away grime.
- Use Baking Soda Paste: For tougher stains, create a paste of baking soda and water, applying it to the affected areas. Let it sit for a few minutes before scrubbing, as baking soda is a gentle abrasive that can help lift stains without damaging the grill.
- Wipe Down with Vinegar: A solution of vinegar and water can be sprayed on the grill surfaces to cut through grease and disinfect. Vinegar’s natural acidity helps break down grime while leaving a fresh scent.
- Dry Thoroughly: After cleaning, ensure all parts are thoroughly dried before reassembling the grill. This prevents moisture buildup, which can lead to rust or mold over time.
When Is It Time to Replace Your Panini Grill?
Knowing when to replace your panini grill is crucial for maintaining cooking quality and safety.
- Uneven Heating: If your panini grill no longer heats evenly, it can lead to improperly cooked sandwiches and a frustrating cooking experience. This can be due to worn-out heating elements or a damaged surface that affects heat distribution.
- Non-Stick Coating Damage: Over time, the non-stick coating can wear off, leading to food sticking to the surface. This not only makes cooking and cleaning difficult but can also pose health risks if the coating starts to flake off into your food.
- Electrical Issues: Any signs of electrical problems, such as frayed cords, unusual smells, or overheating, indicate that your grill is no longer safe to use. These issues can pose a fire hazard and should prompt immediate replacement.
- Physical Damage: Cracks, dents, or warping in the grill plates or body can compromise the grill’s functionality. Such damage can affect how well the grill operates and could lead to further deterioration if not addressed.
- Frequent Repairs: If you find yourself constantly repairing your panini grill, it may be more cost-effective to invest in a new one. Frequent issues can indicate that the grill is reaching the end of its lifespan and may not perform reliably in the future.
What Should You Expect to Pay for a Quality Panini Grill?
- Entry-Level Models ($30 – $60): These grills usually come with basic features such as non-stick plates and basic heat settings. They are suitable for occasional use and can handle simple paninis but may lack even heat distribution and durability.
- Mid-Range Models ($60 – $150): Mid-range panini grills often include more advanced features like adjustable temperature controls, removable plates for easy cleaning, and better build quality. They are designed for more frequent use and can handle a variety of sandwiches with different ingredients.
- High-End Models ($150 – $300+): High-end panini grills offer professional-grade features such as cast iron grilling plates, multiple cooking settings, and superior heat retention. These grills are often built to last and can be used in both home kitchens and commercial settings, providing excellent results with thicker sandwiches and diverse ingredients.
What Advantages Does a Panini Grill Have Over Traditional Cooking Methods?
A panini grill offers several advantages over traditional cooking methods for making sandwiches and other grilled foods.
- Even Cooking: The design of a panini grill allows for even heat distribution on both sides, ensuring that the food is cooked thoroughly and uniformly.
- Time Efficiency: Panini grills heat up quickly and can cook food in a fraction of the time compared to using a conventional stovetop or oven, making them ideal for quick meals.
- Versatility: In addition to grilling sandwiches, a panini grill can be used to cook a variety of foods such as vegetables, meats, and even desserts, providing more options in meal preparation.
- Healthier Cooking: Many panini grills come with a non-stick surface and a design that allows excess fat to drip away from the food, leading to healthier meal options compared to frying methods.
- Easy Cleanup: The non-stick surfaces of many panini grills make them easier to clean than traditional pans, often requiring just a quick wipe-down after use.
- Compact Size: Panini grills are typically smaller and more portable than traditional grills or griddles, making them a great choice for kitchens with limited space or for use in outdoor settings.
Each of these advantages makes a panini grill a valuable tool for both home cooks and professional chefs, enhancing the cooking experience while delivering delicious results.
Related Post: